If you’re not familiar with the insides of a PC, learning how to install an SSD might seem daunting. But it’s one of the simpler upgrades you can make, and the benefits are immediately noticeable. If you’re switching from an older mechanical hard drive, you’ll boot into your operating system in record time and you won’t be stuck on a system’s loading screen for too long.
Which SSD Should You Choose?
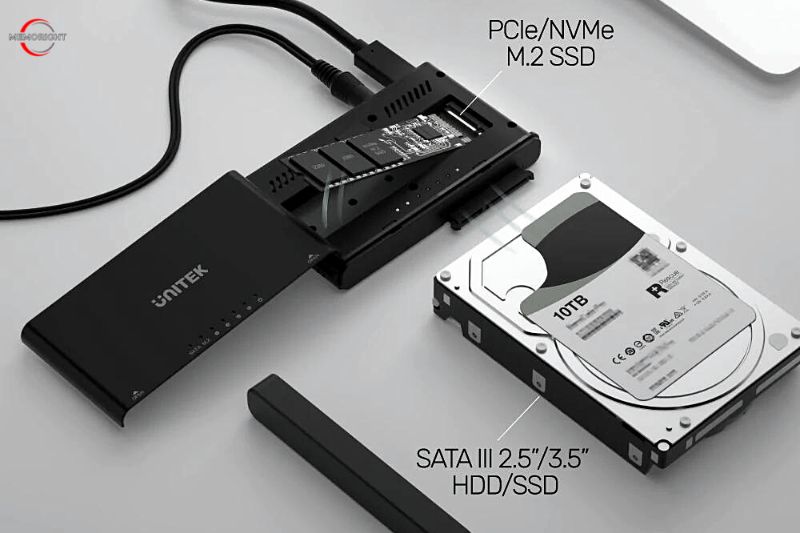
2.5-inch or M.2
Regular hard drives also referred to as hard disk drives or HDDs, are fairly large at 3.5 inches, necessitating enormous cages to accommodate many drives in a single system. Like a record player, hard drives locate data on disks using a physical arm, a process that takes longer and is frequently more fragile than contemporary alternatives.
Due to the first wave of SSDs’ substantially thinner 2.5-inch design, you can fit many more devices in a smaller space. The road to your data is considerably more direct now because of NAND Flash memory, which results in higher read and write rates.
The M.2 SSD, which further reduces the form factor, is the newest and best advancement in this technology. These are available in five various lengths and two different types: SATA and NVMe, without getting too technical. Check whether size and kind are compatible before purchasing if your motherboard supports M.2 SSDs, which it typically indicates on the lower part of the board. The alternative is to purchase a PCIe adaptor and install it next to the graphics card.
Choose the right capacity
Switching between them can be a pain if you don’t choose a storage drive with an equivalent or higher capacity. Those of you moving from a hard drive will probably experience a reduction in available space because SSDs are more expensive per GB. Comparing how much space you’re using on your current drive to what you need is the first thing you need to do.
Select your SSD’s speed
All storage devices are assessed according to their “write speed” and “read speed”. The type of connector significantly impacts how quickly an SSD can operate, with NVMe M.2 SSDs currently holding a commanding lead. The fastest NVMe SSDs are those that support PCIe 4.0, but before spending money on one, you need to ensure your system is compatible. In a PCIe 3.0 motherboard, it will still function, but the speeds will only be as fast as the slowest link in the chain. Read more information about the speed between MNVe and normal SSD here…
Higher speeds are generally preferred, but they are expensive. Depending on company needs, you may need to prioritize either capacity or speeds in order to stay within your budget.
How to Install an SSD on Your Computer?
Install an M.2 SSD on a Desktop PC
Remind to install your SSD safely
- Do not touch the connectors on the drive to protect your new SSD.
- Do not open the SSD. Doing so will void your warranty.
You can connect an M.2 SSD to your motherboard using either an NVMe or SATA interface, but be careful about trying to add an M.2 drive to an older PC. While these slots are common on recent mobos, they can be entirely absent on older models. NVMe SSDs are so fast and easy to install, though, that they’re almost worth upgrading your motherboard for alone.
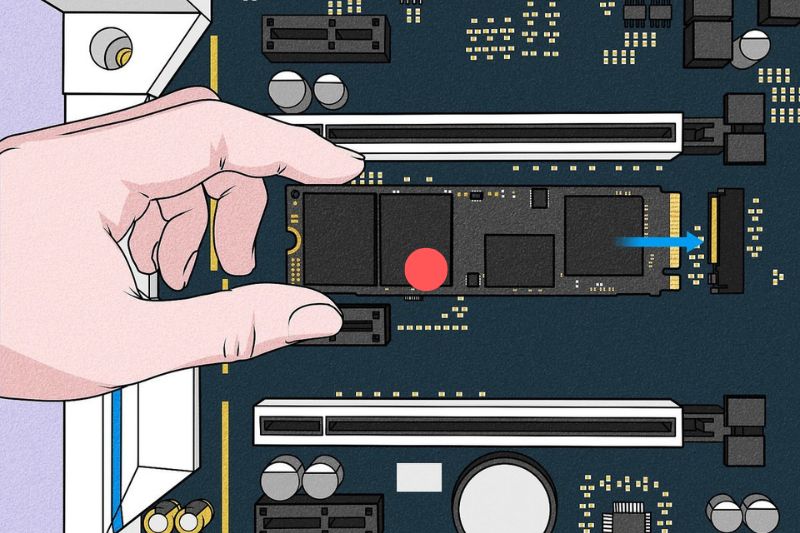
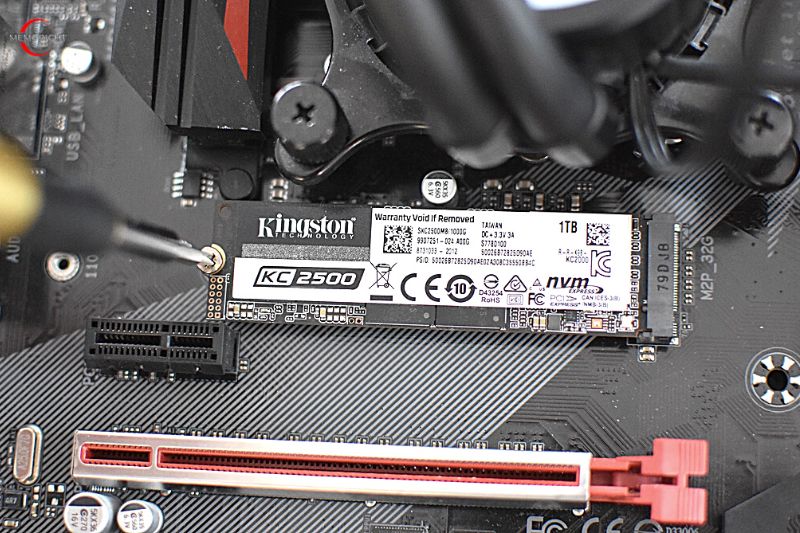
Step 1 – Locate an empty M.2 slot on your motherboard; provided it’s a relatively recent model, there should be between one and three of these.
Every motherboard is different, but the most common locations are below the CPU and around the PCIe slots in the lower half of the board.
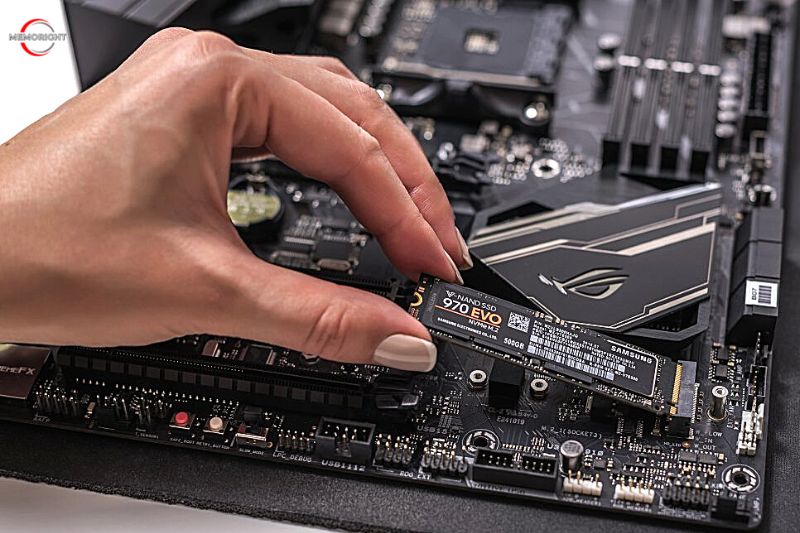
Step 2 – Insert the SSD by sliding it sideways into the waiting slot. It should click in, with the semi-circular notch at the other end becoming aligned with a tiny standoff poking out of the motherboard.
Step 3 – Depending on your motherboard, you’ll then need to either fasten the SSD down by screwing a tiny screw into the standoff or – on newer, higher-end mobos – simply rotating a small plastic latch that will cover the drive and stop it popping back up.
If it needs a screw, you’ll find this either already inside the standoff or in a small bag in the motherboard box. Either way, using your daintiest screwdriver, insert and tighten this screw until it’s holding the SSD firmly in place.
Install a 2.5-inch SATA SSD on a Desktop PC
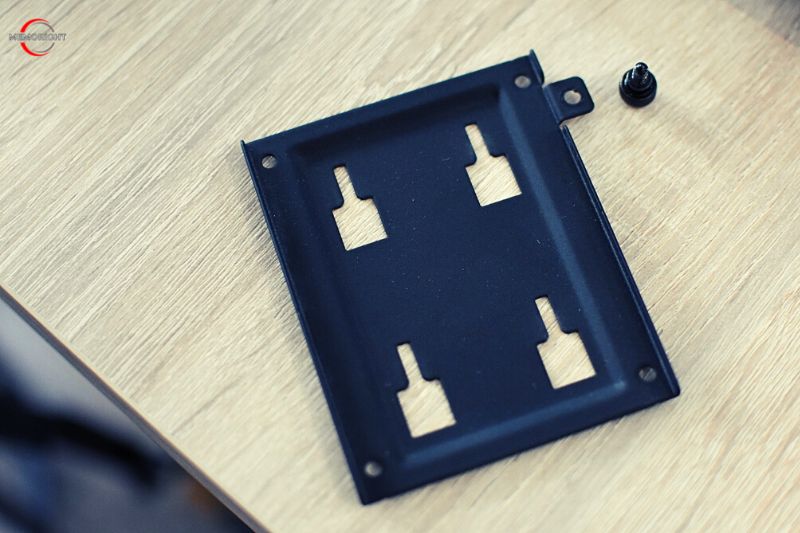
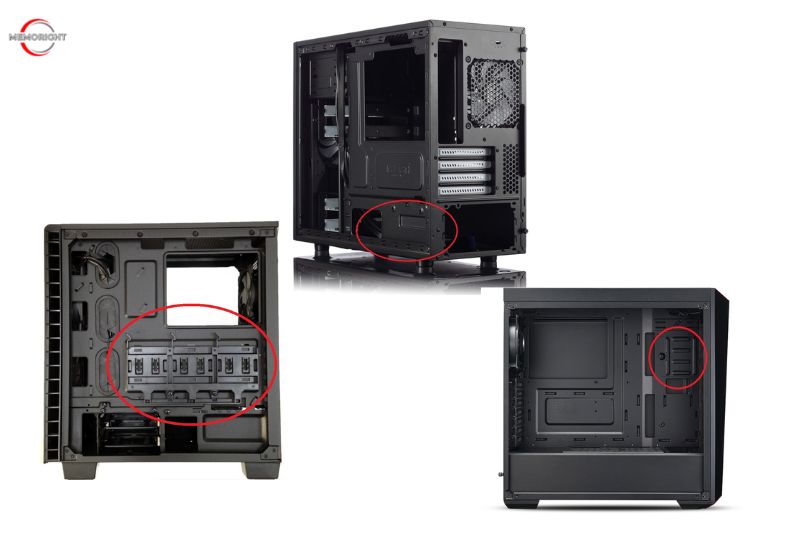
For the bigger but more affordable breed of SSD, you’ll need three things: a SATA power cable, a SATA cable, and a place to sit inside your PC. Cable management will be easier if the drive is already in place, so start by locating one of your PC’s 2.5in mounts. Large 3.5in drive bays usually have mounting holes for fitting a 2.5in drive as well, or there might be dedicated 2.5in mounts attached to the case’s interior chassis. Some cheaper cases also have mounting holes drilled directly into the chassis.
Step 1 – Locate the mounting screws – these are very small and will have come with the case. If you’ve misplaced yours, it’s easy enough to buy replacement screws online, as all SSDs have the same size holes.
Step 2 – Place the SSD in the mount with the holes aligned, then secure the drive in place by fastening the screws. Replace the mount, if it’s a removable one.
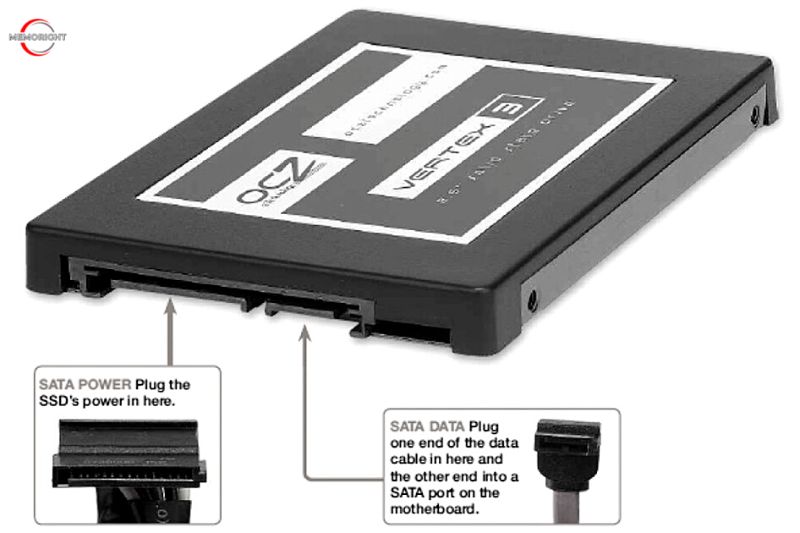
Step 3 – With the SSD in position, you can now attach the power and data cables; these come included with your PSU and motherboard respectively. They also both use distinctive L-shaped connectors, with the power cable being the wider of the two. Plug this into the SSD, and do the same with the SATA cable, which connects right next to it. Plug the other end of the cable into a spare SATA port on your motherboard, which is normally found near the bottom-right corner.
When installing an SSD in an M.2 slot on many motherboards, it can disable individual SATA ports since there won’t be enough bandwidth to support both sets of ports being used. Check your motherboard manual to see which SATA ports are switched off in this scenario and switch to a different port if an M.2 is blocking your SATA drive.
Checking your New SSD and Troubleshooting
After completing the cloning procedure, you can turn off your computer and restart using your brand-new SSD. You must press the Del key during the initial boot-up of your computer to enter the BIOS and adjust the boot priority to your new drive so that it no longer starts from your sluggish hard drive.
If everything goes according to plan when Windows first starts up, you won’t notice anything changed, and everything you transferred will be in its original location. But when you boot games and programs, they’ll be much quicker to load from the SSD.
The old installation is best left alone for a few days so that you can repeat step five if something goes wrong. You can format your previous disk and utilize it as additional storage after you’re confident that everything is functioning.
There are no other details to add. You won’t have to deal with remarks about your hamster becoming tired or needing to crank the wheel to load a game any longer. If you also want to add a few extra frames, you could always look up how to install a graphics card or update your CPU. If you do that, seek how to install a power supply to provide these components with extra power.
FAQs
How many SSD Can a PC have?
Depending on the SATA, M.2, or PCIe ports, you can put 3 to 6 SSDS on the motherboard. A few SATA drives can support up to 8 SSDs. It’s important to assess your requirements when deciding how many solid-state drives to put in a computer or laptop.
Will installing SSD delete everything?
Whether or not an SSD is installed in a computer system has no effect on whether or not it retains its data. Any data stored on an SSD will remain on that SSD when it is removed from a computer and then reinstalled or even moved to another computer system.
How long does an SSD drive last?
All storage devices eventually fail, and unfortunately, SSDs are no exception. That doesn’t mean that they’re unreliable — SSDs offer much faster data access than hard drives, and they’re less susceptible to physical damage. A modern SSD can operate for upwards of 5 years under optimal operating conditions.
Conclusion
In fact, knowing which solid-state drive to choose is more difficult than slotting the thing on your PC. There’s a difference between form factors, as the best SSD for PC is an M.2 NVMe drive, but you shouldn’t count the 2.5-inch SATA device out. Then there are the different generations of ports, which can dictate the speed. Thankfully, all generations are currently backward compatible, but if you pair a Gen 4 SSD with a Gen 3 motherboard or vice versa, you’ll be locked into the lower Gen 3 speeds.
SSDs are becoming increasingly affordable, so it’s easy to mix and match all kinds without breaking the bank. We’ll walk you through what SSD to choose, how to install the thing, and putting Windows back on the drive so you can get right into your program.

